This article is a public note-to-self where I’ll go through the basic configuration I use to get new computers ready for programming in just a couple of minutes. It is centered around the following pieces of software:
- Alacritty, a terminal.
- Zellij, a terminal multiplexer.
- Helix, a text-editor with support for LSP, and tree-sitter.
In my selection process, I heavily emphasized performance, as I strongly dislike when my IDE can’t keep up with my thoughts. I also favored software with sane defaults, such that almost zero configuration is required for great usability. The programs are free, cross-platform, open-source, and they all happen to be written in Rust.
Installation
To avoid these instructions becoming obsolete the moment I hit “publish”, I will present a sequence of URLs to outline the steps required for installation. Context will be provided where necessary.
Microsoft Windows
On Windows, my preferred method is to install Debian through the Windows Subsystem for Linux (WSL) and then install Zellij and Helix within that Debian environment.
Install WSL - At the time of writing, all you have to do is open PowerShell and run wsl --install.
Debian from Microsoft Store - You can also install Ubuntu. I recommend Debian because it is rock solid, and you can use Homebrew to get current versions of software.
Package Managers
While you can use system package managers like apt, you often get outdated versions of the software. I recommend using Homebrew for macOS and Linux, and Cargo (Rust’s package manager) as a fallback.
Curl is required to install both Cargo and Homebrew. Git is required to install Homebrew. Homebrew will also prompt you to install gcc.
sudo apt update -y && sudo apt install curl git build-essential
Install requirements for homebrew on Debian
- Homebrew - The Missing Package Manager for macOS (or Linux).
- Install Rust - Includes Cargo, Rust’s package manager.
Alacritty, Zellij, Helix
I typically use one of these three commands, but you might consider following the linked instructions instead:
# Install everything with Homebrew
brew install alacritty zellij helix
macOS
# A mix of Homebrew and Cargo. Homebrew doesn't package Alacritty for Linux.
brew install helix zellij && cargo install alacritty
Linux
On Windows, you must install Alacritty using the Windows installer.
brew install helix zellij
Debian on Windows Subsystem for Linux
Links:
- Alacritty - A cross-platform, OpenGL terminal emulator
- Zellij - A terminal workspace with batteries included
- Helix - A post-modern modal text editor
Configuration
I mostly tweak font size and themes. Though I provide my dotfiles in full, they are mostly optional.
Alacritty
If you are using Windows, you must configure Alacritty to launch the correct shell, as it defaults to PowerShell.
[terminal]
shell = { program = "debian", args = ["",] }
Windows: %APPDATA%\alacritty\alacritty.toml
If you are using macOS, you must configure Alacritty to treat option as alt to enable the use of certain keybindings in terminal applications.
[window]
option_as_alt = "Both" # No effect on Windows/Linux
dimensions = { columns = 160, lines = 48}

[font]
size = 14

[general]
import = [
    "~/.config/alacritty/themes/themes/rose_pine.toml"
]
Linux and macOS: ~/.config/alacritty/alacritty.toml
Setting the shell to “Debian” on Linux or macOS breaks the config, but appending the Linux/macOS-file to the Windows-file causes no issues.
Helix
Consider “base16_transparent” if you would rather not download or configure themes for Alacritty and Zellij. Use :theme in Helix to preview the included themes.
theme = "rose_pine"
~/.config/helix/config.toml
Zellij
Zellij ships a large default configuration file.
- Open
~/.config/zellij/config.kdl - Search for “theme”.
- Uncomment the relevant line, and set the desired value.
// Choose the theme that is specified in the themes section.
// Default: default
//
theme "rose-pine"
~/.config/zellij/config.kdl
Themes
The default themes are mostly fine, but to get a matching look across all tools, I use the Rosé Pine theme.
- Alacritty themes - Collection of Alacritty color schemes
- Zellij Rosé Pine - Soho vibes for Zellij
Language Servers
Helix uses language servers to provide autocomplete, code actions, and diagnostics. You can see a list of installed servers by running hx --health. Language servers must be installed separately, and often with homebrew.
- Let’s take Java as an example. Pass ‘java’ to
hx --healthto see if an LSP is installed:
kristoffer@INVINCIBLE:~$ hx --health java
Configured language servers:
  ✘ jdtls: 'jdtls' not found in $PATH
...
- Install it with Homebrew:
brew install jdtls. And when the installation is done:
kristoffer@INVINCIBLE:~$ hx --health java
Configured language servers:
  ✓ jdtls: /home/linuxbrew/.linuxbrew/bin/jdtls
...
- Helix now has full support for Java. Repeat for whichever languages or file-types are needed.
💡 The rust-analyzer LSP should be installed with rustup, not homebrew:
rustup component add rust-analyzer
Bonus: JetBrains Toolbox
As someone who also uses JetBrains IDEs, I like to include their Toolbox App in my basic setup.
Summary
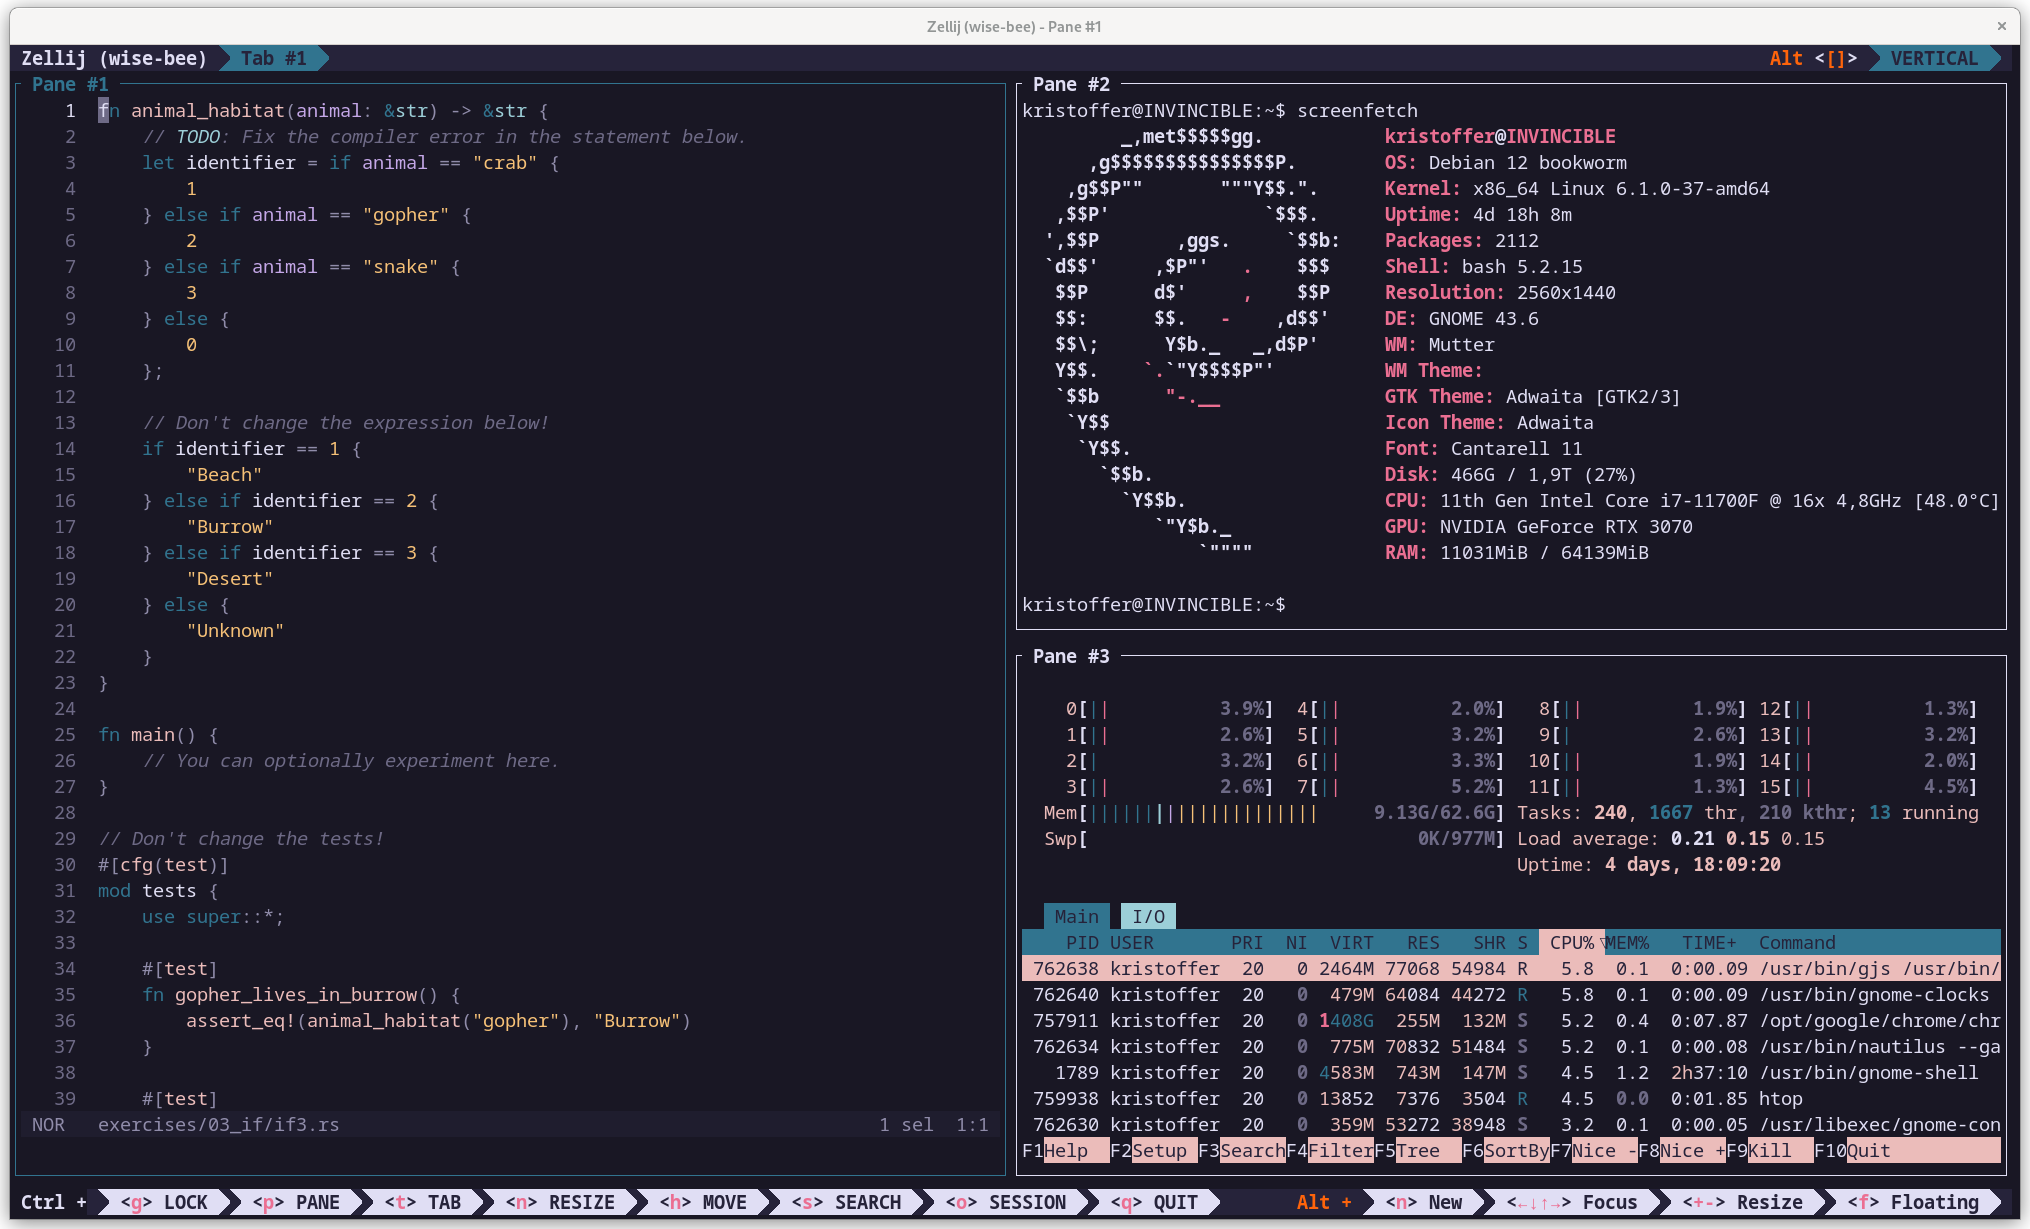
Installing everything should take only a few minutes and gives you a complete and consistent development environment across platforms. The result looks like this on my current machine:
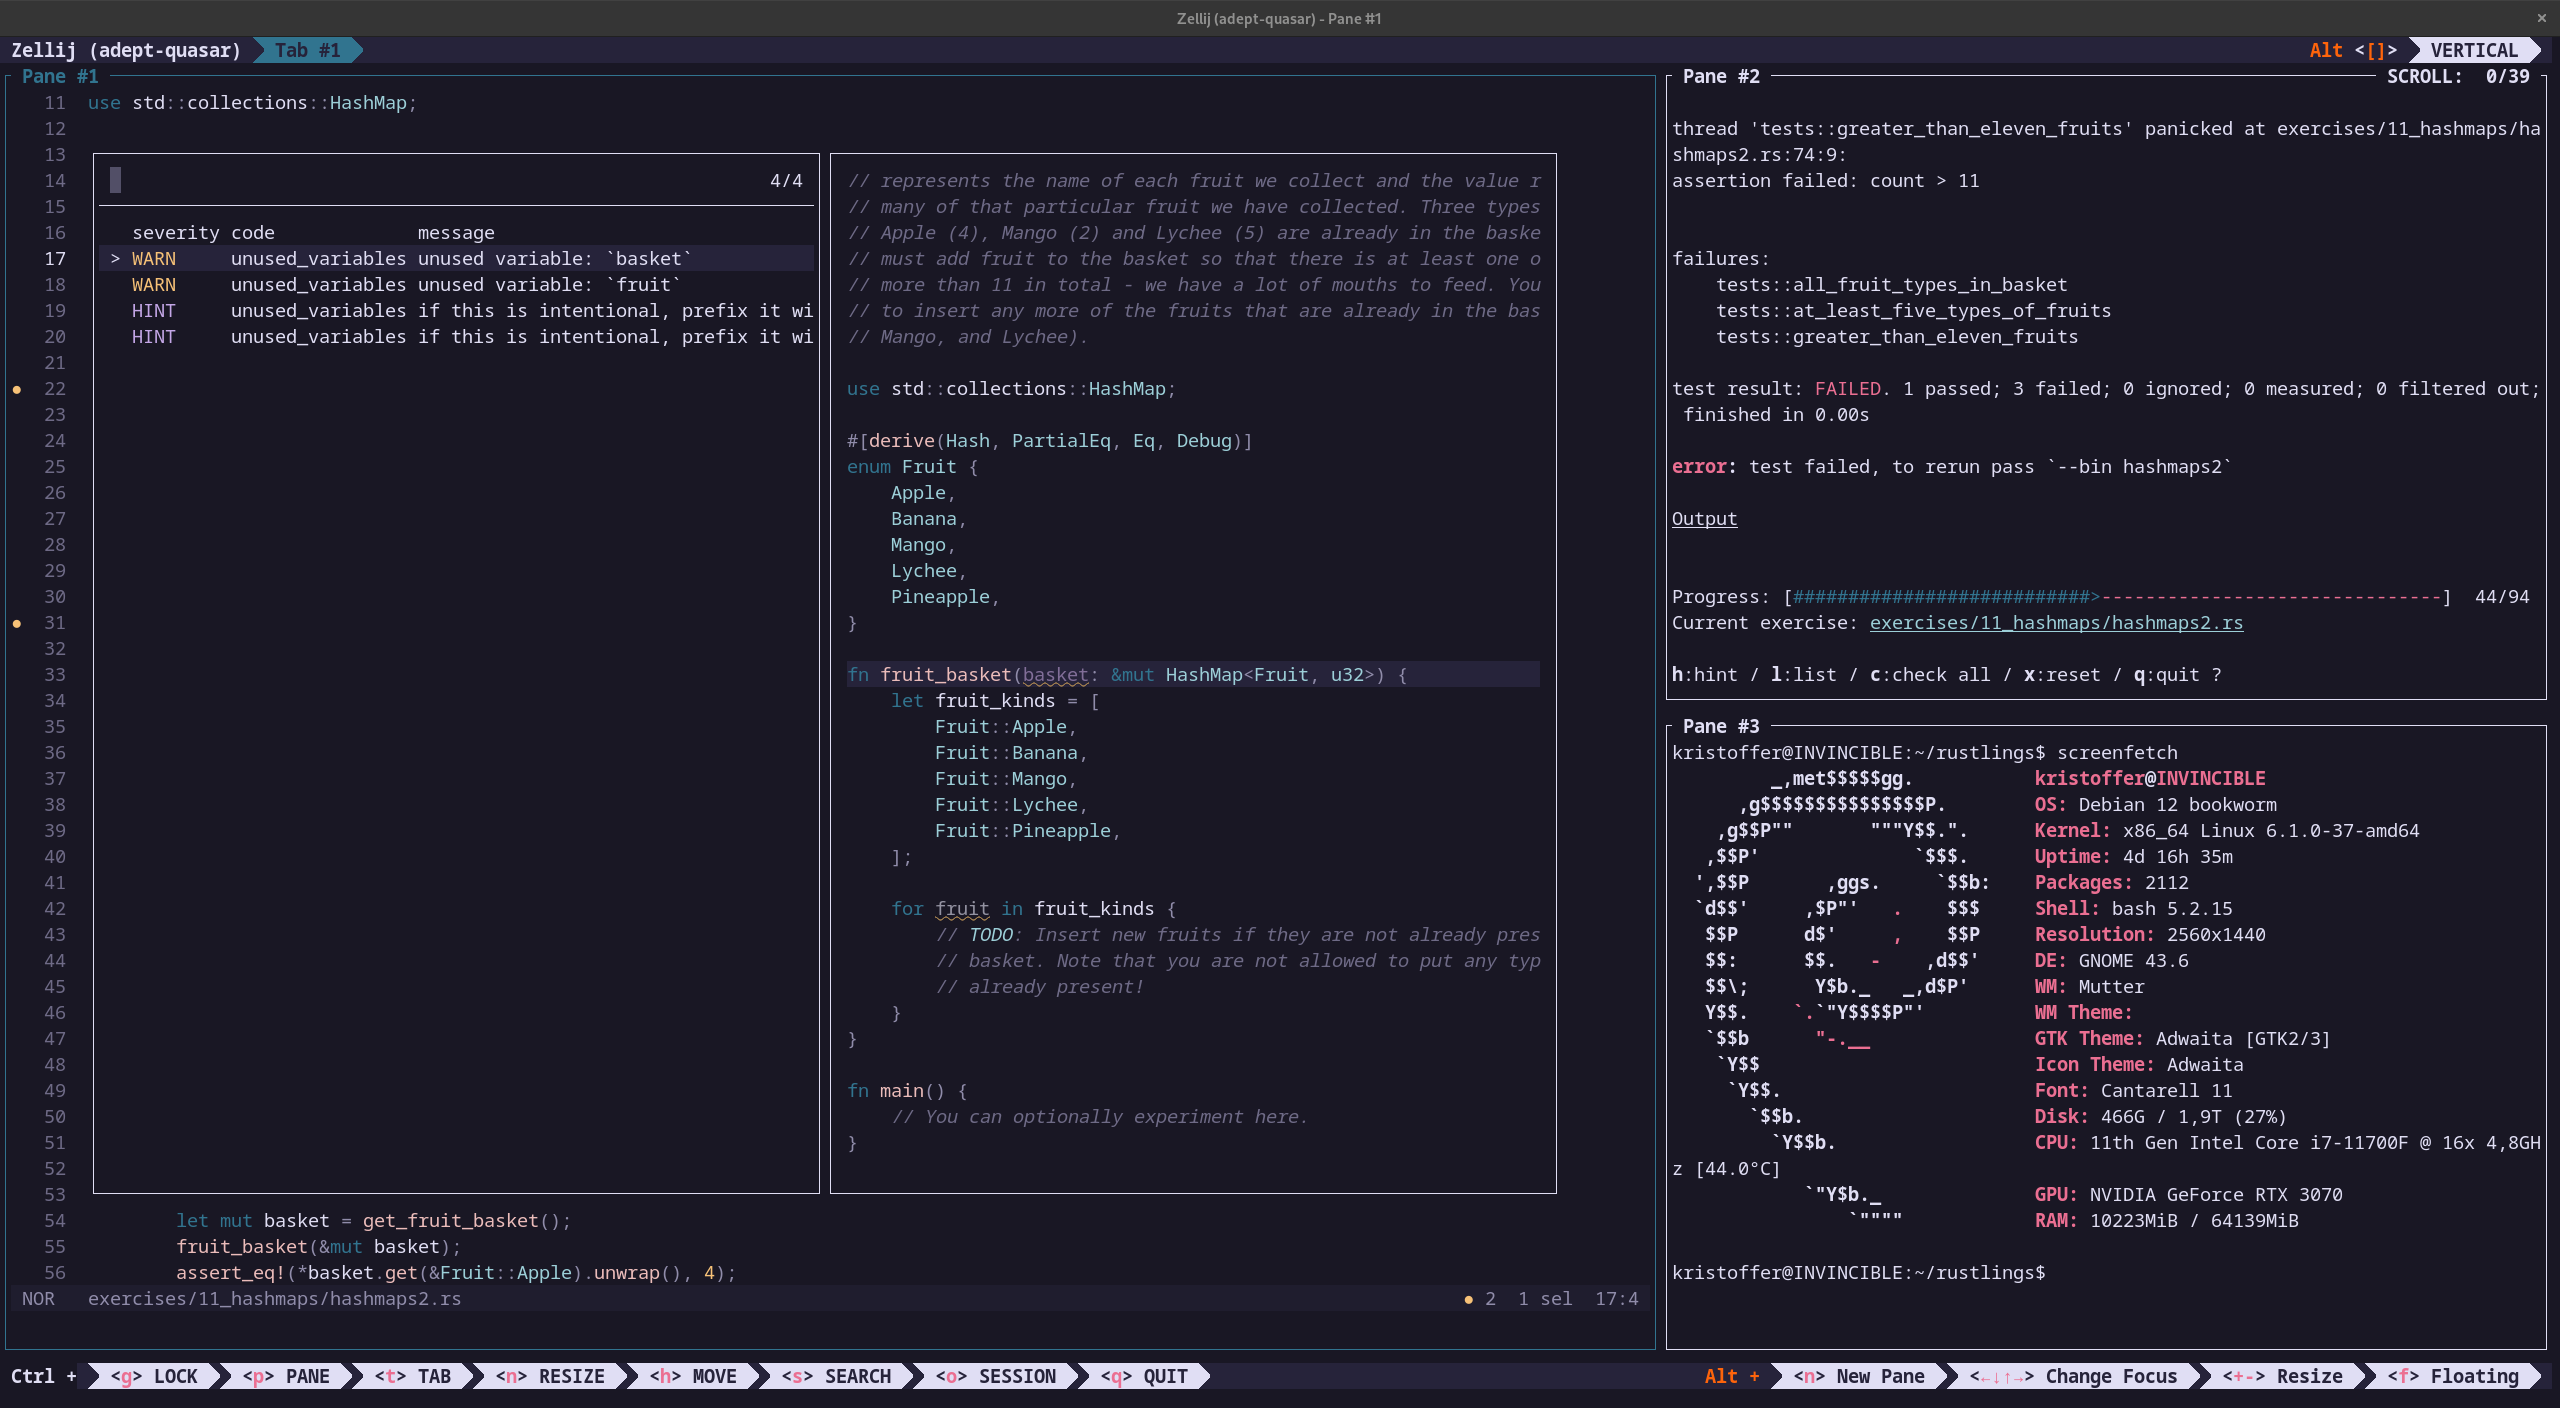
In pane one, I have opened a diagnostic picker in Helix in one of the rustlings exercise files. Pane two is running the rustling executable. Pane three is showing the output from Screenfetch.